


- 1. Unboxing the Foundation Passport: What's included?
- 2. Initial Setup Steps
- 2.1. Powering On and Setting Up PIN
- 2.2. Backup Code
- 3. Connecting to the Envoy App
- 3.1. Preparing the Envoy App
- 3.2. Connecting via QR Code
- 4. Updating Firmware (FW)
- 4.1. Downloading Firmware via the Envoy App
- 4.2. Transferring Files to microSD card
- 4.3. Installing Firmware on Foundation Passport
- 📝 Summary and Additional Recommendations
Foundation Passport is a premium hardware wallet designed to provide the highest level of security for your Bitcoin. It operates air-gapped (offline) and supports management through the Envoy mobile application. This guide will walk you through unboxing, setup, usage, and firmware updates step-by-step.
1. Unboxing the Foundation Passport: What's included?
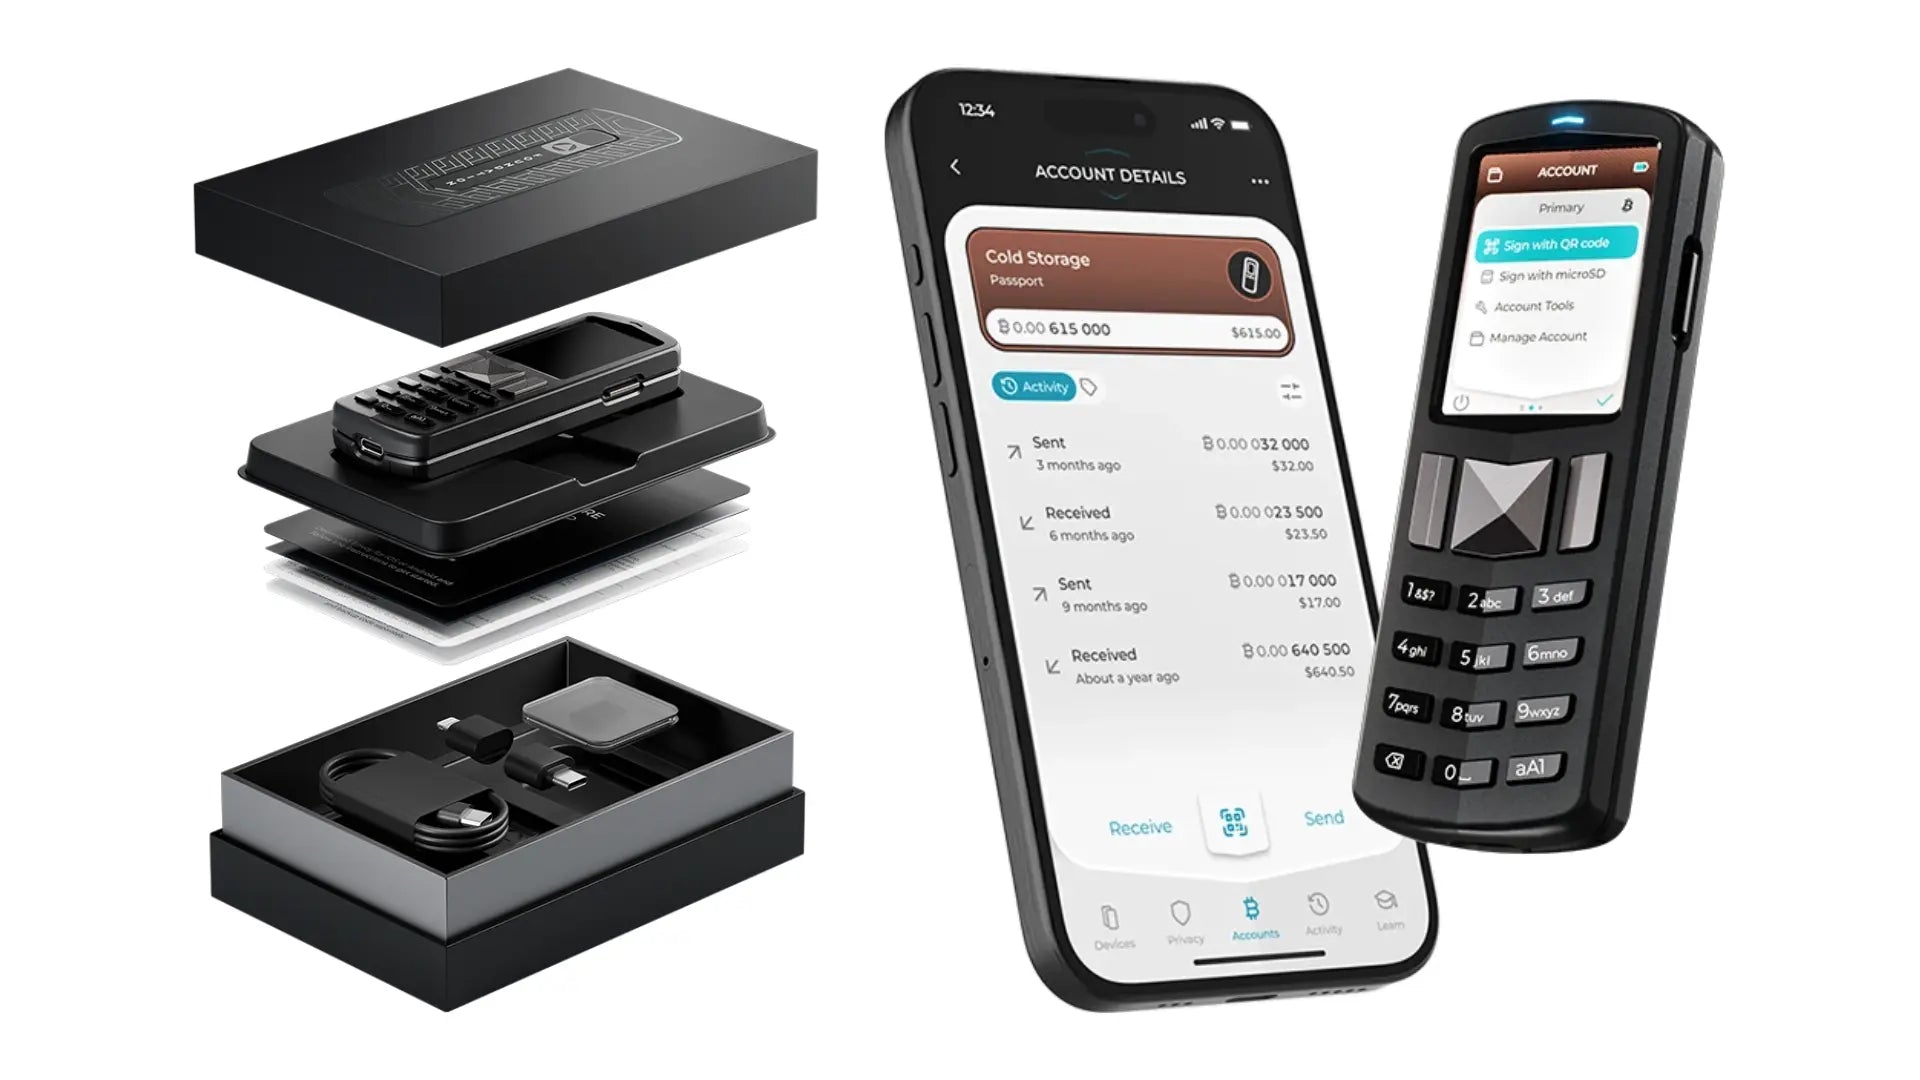
When you open the Foundation Passport (Batch 2) box, you will find these essential devices and components:
- Foundation Passport Hardware Wallet device
- microSD card adapter - Type C/Lightning converter for connecting the microSD card to a smartphone
- USB-C charging cable
- microSD card (usually inside the device or with the adapter)
- Envoy application download guide
- Paper for writing down Backup code/Seed phrase

2. Initial Setup Steps
2.1. Powering On and Setting Up PIN
- Power on: Press the power button on the right side of the Foundation Passport.
- Set up PIN: The system will prompt you to set up a PIN (password) to unlock the device for future use.
- Create Seed: Follow the instructions on the Foundation Passport to create your Seed Phrase, which is the master key to your Bitcoin.

2.2. Backup Code
Foundation Passport uses a Backup Code system, which encrypts the 24-word Seed Phrase into numbers for easy storage.
- Write down Backup Code: The system will display the Backup Code for you to write down on the provided backup paper (important: keep this paper in the safest place!).
- Save Backup Code: The Backup Code will also be stored on the microSD card (when ready for use).
- Confirm accuracy: Foundation Passport will ask you to enter the Backup Code you wrote down to confirm it was recorded correctly.

💡 Note: This Backup Code is encrypted and cannot be directly used for recovery on other hardware wallets. However, you can view the 24-word Seed Phrase later for recovery by going to Settings -> Advanced -> View Seed Words.
Once all steps are completed, your Foundation Passport is ready for connection!

3. Connecting to the Envoy App
Envoy Application is a mobile application that allows you to easily check your balance and create transactions, using an air-gapped connection via QR Code scanning.
3.1. Preparing the Envoy App
- Download app: Download and install the Envoy Application on your smartphone.
- Start in app:
- Open the Envoy app and select "Set up Passport Device".
- Choose "Set up new device" (for new users) or "Connect an existing Passport" (for those who already have a Foundation Passport).
3.2. Connecting via QR Code
This step involves scanning a QR Code from your mobile with the Foundation Passport, and then scanning a QR Code from the Foundation Passport with your mobile.
- On Foundation Passport: Go to Primary -> Manage Account -> Connect Wallet -> Envoy (or other Software wallets you want to connect to).
- Scan QR Code: The Foundation Passport will show a camera to scan the QR Code appearing on the Envoy app on your mobile.
- Confirm connection: Follow the steps specified by the Envoy Application until completion.

Now, your Foundation Passport and Envoy Application are connected and ready to use!
4. Updating Firmware (FW)
Keeping the firmware updated to the latest version is crucial for device security.
4.1. Downloading Firmware via the Envoy App
- Access Device Menu: In the Envoy app, go to the home screen and select Device -> [Your Foundation Passport].
- Check FW: If a new version is available for download, click on the latest FW version.
- Download: Click "Download Firmware".

4.2. Transferring Files to microSD card
- Connect microSD: Connect your microSD card to your smartphone using the provided adapter.
- Move file: Move the downloaded Firmware file into the folder named PASSPORT-SD (create it if it doesn't exist).
- Remove: Remove the microSD card from your mobile and reinsert it into the Foundation Passport.
4.3. Installing Firmware on Foundation Passport
- Access Update Menu: Go to Settings -> Firmware -> Update Firmware.
- Select version: Choose the latest version you downloaded.
- Install: Click to install the Firmware.


Once installed, your Foundation Passport will be updated to the latest version and ready for continued use.
📝 Summary and Additional Recommendations
Foundation Passport is a hardware wallet suitable for those who seriously want to self-custody their Bitcoin, with these key features:
- 100% Air-gapped: No direct internet connection.
- High security: Secure backup system and offline updates.
- Convenient to use: Easily manage your wallet through the Envoy app on your mobile (or other applications like Sparrow, Blue Wallet, which can also connect via QR Code).
The initial setup might seem to have many steps, but each step is designed for the utmost security of your assets.



แชร์:
Blockstream Jade Classic Quickstart Guide
How to set up SeedQR on Blockstream Jade/Jade Plus